The baseboard is the trim, the protection for the wall from various impacts along with being easier to clean thanks to the buildup of dirt and debris. Attaching baseboards to the walls requires the right size or gauge of nail. This is because baseboards are usually made from material that is different compared to the walls, but more importantly is thinner.
This means that the type of nail used must be long enough to secure the baseboard to the wall. But not long enough that it can penetrate the wall and damage pipes and electrical conduits. Understanding what type of nail is to be used means knowing what gauge of nails are available.
What is a Gauge Number?
You’ll find trim nails with various gauge numbers which may make them a little confusing at first to purchase. This is because the larger the gauge number, the smaller the nail. The same is true for shotguns as a 12 gauge is bigger than a 16 or 20 gauge.
When using a finish nailer, the normal gauge sizes for the nails used for baseboards is 15 or 16. Remember that the bigger the gauge, the smaller the nail, so you will want to use a device that can handle the small nails necessary to secure the baseboard. The smaller the nail, the less you will have to fill afterward, although if the nail is too small, it may not properly secure the baseboard to the wall.
Why Use Small Nails?
There are good reasons why you should ensure that the nails you use are the minimum size required and no more.
- Prevent splitting the wood
- Less to cover
- Blends in better when painted
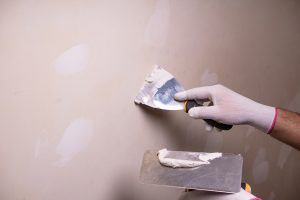
Many people will paint the baseboards the same color as the walls, which means that if you use small nails there is less to sand and shape before you paint. If you choose not to paint the baseboards, then it is recommended that you use a punch which will push in the hole where the wood has been stained. You can then fill the hole with some filler or putty.
Either way, it is important that you smooth out the finish so that the head of the nail does not protrude. That is why getting the right size and length is important.
Best Size Nails
The right size will be determined by the width which is the gauge and the length. If you know exactly where the pipes and conduits are along the walls, you might be able to use longer nails but that is not recommended.
Instead, you should use the small gauge possible with nails no longer than 1 ½”. If you are using a brad power nailer, this is the perfect size and will make attaching the baseboards to the walls easier. If you are concerned that the nails may split the wood of the baseboard, you can pre-drill them first and create a hole that is slightly smaller than the nail.
While more time-consuming to pre-drill the holes, the advantages start with being far less likely to split the wood, using slightly larger nails if you desire, and making a clean hold that can easily be filled with glue or putty. Once completed, you can then sand down the areas to make the finish smooth and neat. At that point, you can figure out what type of protection is needed for the baseboards.
Don’t Be Confused by the “D”
You may have noticed that many boxes of nails will have a “D” following the number, but before the length. For example, an 8D or 8d nail that is 1 ½” long. The “D” is actually an ancient term used during the time the Romans occupied England over 1,500 years ago. The “D” actually stands for pennies, so it would be an 8-penny nail.
This is because nails were hand-forged at the time and quite valuable. So, 16-pennies nails would cost 16 Roman pennies which at the time were called Denarius and thus the “D”. So, while the origins of the term “D” is interesting, do not let it throw you off of finding the right nails for the job.
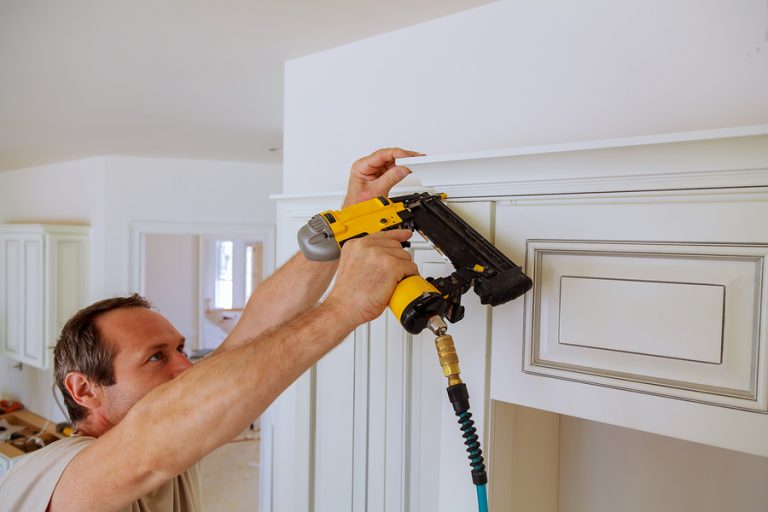
Nailing Baseboards to the Wall
Once you have your baseboards, let them sit inside the home for up to 48 hours before you nail them to the wall. The reason is simple in that wood will change shape when exposed to different environmental conditions. This is especially true of wood that is thin such as baseboards. When you let them sit first, they will alter in shape and then become fixed.
If you do not let the baseboards acclimate, you may find yourself with warping baseboards that are attached to the walls which creates a lot of issues. So, let them sit for a couple of days in the rooms and hallways where they will be used.
Now you are ready to attach the baseboards to the walls. You can pre-drill the holes if you like. Or, if you are using small nails such as 15 to 16 gauge which are generally the most common for baseboards, you can start hammering. Keep in mind that nails which are even smaller, such as 16, 18, or even 23 gauge can be used to line the baseboards. While the larger 15 to 16 gauge can be used as anchors on the corners.
Once you have put the baseboards into place, you can then sand down the heads of the nails and fill the holes with putty or glue. When that is completed, you can paint the baseboards to match the wall or leave them as is with the stain. Either way, you’ll want to protect the baseboards as well, so using stain or paint is recommended.

The advantage of baseboards is that they not only add additional protection to the wall, they can also be removed and replaced if they get damaged. That’s why using the right nails and techniques to put baseboards in place can be most helpful.
Founder of HandymanGuides.com and self-proclaimed “Mr. Fix-It”, Mike has countless years of experience building and tinkering with everything under the sun. He works as a local repair guy near Santa Monica, CA and when he’s not spackling drywall, he enjoys spending time with his wife and 2 daughters.