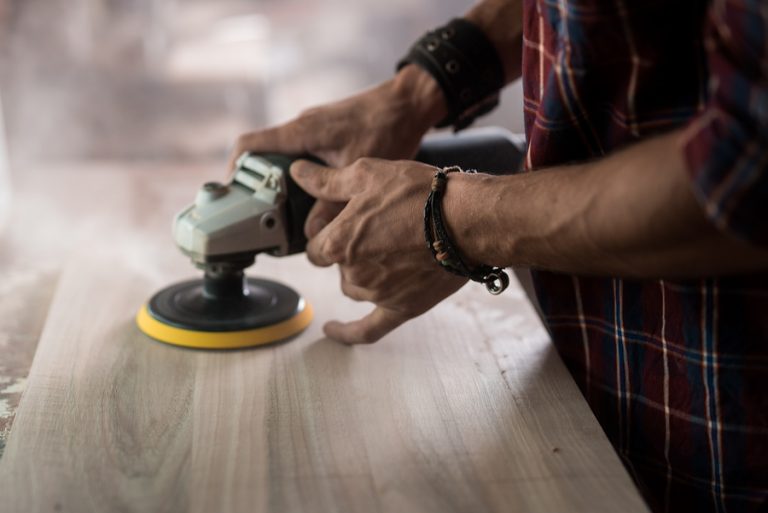
An orbital sander is one of the easier power tools to use. However, just like chess, it takes very little time to understand how it works, but it does take longer to master it. For those who have learned the hard way, using an orbital sander requires using certain techniques so you can get the most out of it. What follows are a few tips that will help you use the sander correctly.
Purchase High-Quality Discs
You may think you are saving money when purchasing cheap sanding discs, but the truth is that the low-quality versions often cut deep and leave behind noticeable scratches. It is far better to invest in high-quality discs because they do the job and last for a long time. This means that you actually money in the long run while producing the best work.
Place the Sander on the Wood and Then Start
Before starting the sander, put it on the wood first. This will ensure that you do not create deep scratches. If you lift up the sander when working, be sure to turn it off before putting it back on the surface. Otherwise, you risk scratching the wood.
Take It Easy
Perhaps one of the more difficult things to learn about an orbital sander is that for it to work properly you need to go slow. This may seem counterintuitive as the purpose of the sander is to speed up your work. But if you go too fast, you will leave behind visible scratches in the wood.
Instead, pace yourself so that you move the sander across the surface at a rate of one inch per second. This is actually slower than it sounds, especially if you are trying to sand a large surface. But if you can maintain that pace, the scratches that are created by the sander become essentially invisible.
Understand the Pattern
This type of sander moves in a circular fashion, but it also wiggles a little as the disc rotates. When used correctly, the result is a random pattern of scratching that radiates out in all directions which means that they are practically invisible.
However, when used incorrectly, you will see swirls in spiral patters on the wood. Even if you do not see them on the raw wood, after you apply a coat of stain, they will become quite noticeable. If you have never used an orbital sander before, practice on a piece of scrap wood and then apply a coat of stain to reveal any swirling pattern.
Hold Near the Base
One of the dangers in operating an orbital sander is that it might tip when in use. This can create deep gouges in the wood. To help prevent it from tipping, hold the sander close to the base around the neck. You may want to wear a glove to protect your skin in case your hand slips down, but for the most part, you should be safe.
Do Not Press Down
Again, this may seem counterintuitive as the more you press down, the deeper into the surface area you go and theoretically remove more imperfections. However, the opposite is really true as pressing too hard slows down the spinning of the sander and you get those ugly-looking swirl patterns.
Instead, the weight of the sander along with the normal pressure to keep it on the surface works best. This applies enough pressure to remove a thin layer of the surface without creating the swirls.
Sand by Half
If you have a large surface, you’ll want to overlap each pass by at least 50%. This will ensure that you have sanded the surface evenly and completely. While it will take a little longer, you stand far less of a chance of missing scratches and other imperfections.
Use Two Sanders to Speed Things Up
What’s better than one orbital sander? Two orbital sanders working together. Once you get the hang of it, you can then use another orbital sander and speed up your work. Be sure to work them together using the same speed and coverage area. This will ensure that you sand the entire surface in just half the time.
Attach a Vacuum
The best way to keep the sawdust off the wood is to attach a vacuum to your orbital sander. Many orbital sanders have vacuum attachments that not only pull the sawdust into the vacuum, they also reduce the number of airborne particles.
If your orbital sander does not fit your vacuum hose, there are adaptors you can purchase which cost from $5 to $10. It’s certainly worth the price when you consider the clean up involved when you are not using a vacuum.
Wear Gloves
This is optional as if you hold the orbital sander correctly, you should not be in any real danger. However, one issue with orbital sanders is that they vibrate which may cause your fingers or hand to become numb. At the very least, it creates a strange feeling in your hand after using the sander for an extended period.
You help lower the vibrations by wearing gloves that have pads. These anti-vibration gloves mean that your fingers and hand is less exposed to the vibrations while gripping the sander. However, this type of glove tends to be thicker which may make the sander a little more difficult to control. Plus, on really hot days your hand will start to sweat profusely. So, take that into consideration before purchasing the gloves.
Hand Finish
Once you have finished with the orbital sander, go over the surface again by hand. You only need to remove any random scratches the sander might have created. You can use standard sandpaper as long as the grit is identical to what is used on the sander. Make a few passes and inspect your work.
Using an orbital sander is easy, using it right takes a little work. But when you create a proper working pattern, you’ll find that the orbital sander saves you time and effort while still delivering remarkable results.
Founder of HandymanGuides.com and self-proclaimed “Mr. Fix-It”, Mike has countless years of experience building and tinkering with everything under the sun. He works as a local repair guy near Santa Monica, CA and when he’s not spackling drywall, he enjoys spending time with his wife and 2 daughters.


